Monday, November 30, 2009

Grateful Giggles

Today was the first day back at school following Thanksgiving/fall break. The parking just got a whole lot more difficult but having students noisely making their way down the hall and stopping by for a quick hello and/or a treat from the candy bowl makes walking from 'the pit' down the hill all worth while.

My day ended late with three giggling freshman girls sprawled out on my office furniture. They all agreed that break was good but too long, boring, and that they were glad to be back with friends and even back at school. It was fun to listen to them flit from one random discussion to another. They ate a fair amount of candy - so on a sugar high - and laughing hysterically - I politely told them I was tired, it was late, and I was going home.


Even though I didn't get home until after 8 pm I did manage to log some bubble time. It's Monday so I immediately checked in with Mojo Monday for today's challenge. Here is what I came up with...


Grateful for Mojo
~Base card Ocean Tides - PTI
~Layer of Cosmo Cricket
~Oval of Cosmo Cricket using Spellbinder's Oval Nestabilities
~Image from Clipart ETC colored in using Copics, topped with Glossy Accents and Crackle Accents
~Oval is Ocean Tides - PTI - stamped using Stampin' Up Small Scripts
~Hardware is from Stampin' Up
~Ribbon from the Dollar Tree
You can get up close with the card by clicking on the image.
All good wishes,
Nancy

Sunday, November 29, 2009

Beaded Lists


I was looking around my bubble today, and being someone who likes lists, I thought I would make a list of items I used all the time, things I really am glad I have, things I am on the fence about, and of course the things that I look at and say – OMG WHAT WAS I THINKING? I bought this WHY?

For starters here is my list of Crazy Purchases….
~Lavish Lilac Fun Flock – Flocking – REALLY???? My house was FILLED with flocked wallpaper when we moved in many years ago and I couldn’t tear it down fast enough! AND I am SO not a pastel person!
~Pink Crystal Opaque Embossing Powder (pastel? AGAIN?)
~Wintergreen Pastel Embossing Powder (it is a mint green color - did I mention I am NOT a pastel person?!)
~4 metallic colors of Ultra Thick Embossing Enamel – ICK – it is horrible to use – unless you like clumps and blurred outlines
~Evergreen Embossing Powder – seeing a pattern here??? Must have been an embossing powder phase
~Beadies – mini marbles - REALLY????? (well - at least they were only 49 cents)
~Quic Kutz Quick Stik – The Quiker-Poker-Picker-Upper - I haven’t poked, prodded, or picked ANYTHING with this ‘had to have it tool’!
~Brass Dry Emboss Templates – OMG – these take WAY too much time (and of course I have the embossing stylus!)
~There are plenty of ‘what was I thinking’ stamps in my bubble
~Large quantity of JPU patterned papers too (JPU - Just Plain UGLY)

Regarding cards - I decided not only would I work on several challenges I would FORCE myself to use at least ONE item from the "REALLY???? I Actually Thought I HAD to Have THIS??? List."

Beaded Script

This challenge comes by way of Paper Garden Projects Fourth Friday of the Month. The instructions are to create a stamped background and if possible use the color black in honor of Black Friday.
~Base card – Pure Poppy by PaperTrey Ink edges smudged with black
~Layer of white cardstock (PTI) stamped with Le London Script by Stampabilities using Versamark and coated with Ranger Black embossing powder – edges smudged with black ink
~Four red eyelets (gift from sister Gail)
~Strip of double sticky tape with Beadies Mini-Marbles (I USED them – I actually USED them!!!)
~Heart image is from the dollar bin at Michaels (Katie & Co by Studio G) – It is stamped with Versamark, embossed with Ranger Black embossing powder, colored in with Copics, and heart is top coated with Inkssential’s Glossy Accent
~Sentiment is from the Michael’s dollar bin, stamped with Versamark and embossed with Ranger Sea Foam powder and Ranger Rich Red embossing powder

Thinking of You Ornaments
Challenge over at Our Creative Corner was a sketch (layout)~Base card - white cardstock (PTI) edges smudged with Tim Holtz Distress Ink – Brick Red
~Layer of red cardstock – edges smudged with black
~Layer of patterned paper by American Crafts – I smudged the sides and top a bit with Distress Ink Peeled Paint
~Horizontal red cardstock topped with layer of red/green ribbon and a separate red satin bow
~Gold braid is Wright’s Beader’s Choice (another ‘giftal’ from sister Gail)
~Scallop punches of DCWV Glitter Cardstock Stack topped with holiday stickers bought at an after-holiday sale (Wal-Mart)
~Sentiment by Just Rite stamped on olive green cardstock punched using Stampin’ Up Word Window

Peaceful PunchesPunch Happy was the challenge at Crazy for Challenges with the only direction to use paper punches
~Base card – PTI Spring Moss, edges smudged with Distress Ink Peeled Paint
~Layer of BasicGrey
~Variety of green cardstocks punched using Martha Stewar t branch glued down in the shape of a wreath
~Sets of threes red paper punch dots topped with Glossy Accents
~Dove punch (Martha Stewart) punched twice – once on gold/vanilla; once on blue – and layered then topped with Glossy Accents
~Metal corner brad (was red – I dabbed some bronze acrylic paint on it.
~Sentiments by Just Rite Stamps – stamped on olive cardstock, punched using Stampin’ Up Word Window

Maybe I'll tell you about the rest of my bubble lists in subsequent posts.

You can get up close with the card by clicking on the image.

All good wishes,
Nancy

Monday, November 23, 2009

Crimpin' My Style

I may have to take time for more Copic coloring. It is so nice to have a supply of completed images - colored, coated, cut and ready for action. OR - maybe I should just go back on vacation and do LOTS of Copic Coloring. Nila, Judy, Gail - are you ready for a repeat trip to Shellman?

Yesterday was Monday - so I had to check out the Monday Mojo Challenge. When I saw the layout from Mojo I knew I wanted to use my crimper in place of the scallop. (I was going for an awninig or window shade look...) Next I looked in my Shellman Stash of ready-to-use images. Next came the paper selections. And to top it off - Sister Gail sent me a fabulous pile of brads that she bought me at Hobby Lobby. She was so excited that they were 50% off....Do I dare tell her that they are half price about every 5-6 weeks????!!!!

This is an image from Clipart Etc. Some of the areas are left uncoated, some are coated with Inkssentials Glossy Accents, some with Inkssentials Crackle Accents. I muddied up the white background with Tim Holtz Old Paper Distress Ink.


Crimpin' My Style
~Base card - vanilla (just plain cardstock - I didn't use my usual/favorite cardstock PTI - but this was ready cut and ready scored - and I was feeling lazy)
~Layer of design paper from My Mind's Eye
~Three layers of crimping - My Mind's Eye, brown cardstock, and PTI Ocean Tides (my favorite color of PaperTrey Ink
~Really cool brads by Spare Parts

You can get up close with the card by clicking on the image.
All good wishes,
Nancy

Hightech Tetherball

How cool is this? I am posting this, from my laptop, while I'm in the car! Don't panic - I'm not driving. My new cell phone has a tethering capability - so I'm accessing the world wide web via my phone. Way cool beans! I don't have anything to report on I just want to give this (new to me) technology a go.

Card recipe:
Autumn Shadows
~Base card - olive by Stampin' Up
~Layer of BasicGrey
~Layer of Bazzill solid
~Image is combination of PaperTrey Ink (Life) and Stampin Up (The Art of Life)
~Images stamped with Ranger Old Paper, Olive and Versamark
~Ribbon/yarn
~Hodgepodge clip by Stampin Up

Well, we've arrived at our destination: Omaha, NE. I will untether for now and check in with you later. That reminds me - we had a tetherball in the back yard when I was growing up. Do kids even PLAY tetherball anymore? Probably not without lots of protective gear.

You can get up close with the card by clicking on the image.

All good wishes,
Nancy

Sunday, November 22, 2009

Twilight Parking


I spent so much time in the bubble this weekend I'm actually looking forward to going to work in the morning. One reason to look forward to going to work - is - the parking will be GREAT! Nearly all the students are off campus - at home with family for break and the holiday - SO.... yippy skippy - parking aplenty!

The challenge at Stampin' B's Design was an homage to the book/movie Twight. The instructions are to use Red, White, Black, and a Moon. I've never seen the movie, haven't read the book, don't plan on doing either but I'm not one to pass up a challenge like this!

New Moon Spider
~Base card - white PTI - edges smudged with black Stampendous ink
~Layer of DCWV cardstock matstack - and guess what? I SMUDGED the edges!
~Layers of rectangles with edges curved, first layer is DCWV Glitter Cardstock Stack (white). I really like this white glitter cardstock - very versatile! Layer of the same DCWV as the base layer; layer of black cardstock - edges smudged with white ink; layer of red.
~Image is stamped (Stampin Up Booglie Eyes) on PTI white using Versamark and Ranger black embossing powder, the body of the spider colored in with Versamarker then embossed with Tim Holtz Distress Powder, google eyes added just for fun (spider is part of the Booglie Eyes set from Stampin Up)
~Black 'web' is stretch net that formerly housed a bunch of rubber bats (cool - huh?)
~The sliver of moon is a glittered brad
~Assortment of ribbons

This may not be what the nice ladies at Stampin'B's had in mind but I sure had fun with it!

Bright Birthday
~Base card - white PTI edges smudged with Cotton Candy
~Layer of DCWV The Glitter Stack
~Horizontal layer of orange then layer of DCWV Glitter Cardstock Stack then hot pink sheer ribbon tied across lengthwise
~Tilted layers of neon yellow and orange cardstocks topped with polka dot layer DCWV Nana's ~Kids cardstock stack
~Top squares of dark purple, light blue, and white glitter cardstock
~Cake image colored in with Copics and some of the frosting coated with Stampin Up Crystal Effects, candle flames touched up with a bit of yellow glitter. The image is by Elizabeth O Dulemba.
~Metal happy birthday tag from Oriental Trading
~Lime ribbon added to the pink sheer ribbon

You can get up close with the card by clicking on the image.
All good wishes,
Nancy


Saturday, November 21, 2009

Dumplins' & Dragons


Where did the morning go? I really only got two cards made? I also looked through my favorite cook book.... Does that count as cooking? I was in the kitchen while I skimmed through the book....

No need for me to cook last night! Mother (AKA Memere Old) made one of my FAVORITES - Chicken n' Dumplin's! And a choice of dessert - homemade apple pie or cream puffs! No doubt about it I went for the cream puffs. (I hear Sister Judy makes THE BEST cream puffs ever - maybe I should instigate a mother/daughter/sister cream puff challenge.) I have to admit it scares the beejeezes out of me that this 90 pound 92 year old is using a pressure cooker - but arguing with her is even scarier. No need to cook tonight as I now have leftovers from last night.

These card colors diverge from my usual palette. I liked the layout sketch (C4C12) posted today at Crazy 4 Challenges so I decided to go for it. I think I mentioned that while on vacation I colored in several stamped and digital images using my Copics. So when I colored these I had no idea what the future would hold for them - no layout plans, no idea if I had design paper to coordinate...Not sure that was such a good idea but I do like having a stock of already colored and coated images.

Dragon Greetings (Crazy 4 Challenges C4C12)~Base card: PTI~Layer of DCWV Nana's Kids matstack~Rectangle - layer of orange cardstock and layer of Oh Baby Boy by BasicGrey~Square is layer of orange cardstock and repurposed blue and green file folder and note card, respectively.~Image is a digital freebie from Elizabeth O. Dulemba , colored with Copics and coated using watercolor varnish~Sentiment (Stampendous Flexible Friendship Wishes) is layered on blue, orange and green
Pastel BouquetThis layout was made up on the fly~Base card - PTI - white - edges smudged with Stampabilities Cotton Candy~Layer of Bazzill blue cardstock~Layer or design paper from Oriental Trading~Layer of white - DCWV The Glitter Cardstock Stack; edges punched with Martha Stewart trellis punch~Second layer of design paper from Oriental Trading; edges curved with punch~Image is from stock.xchng I overcolored it with Copics, added flower brad centers and hot pink ribbon bow
You can get up close with the card by clicking on the image.
All good wishes,Nancy

Friday, November 20, 2009

Dental Mnemonics

Daughter Amy just called - she completed her oral comps for her master's program in accounting. I don't know who is more relieved her or her support systems. Now the wait is on for the results...

The challenge at Our Creative Corner was to create a card with a postcard theme.

I didn't have a postcard stamp so I improvised. Last week I received a dentist appointment reminder postcard in the mail so I re-purposed it! I cut the edges katy-wompis-like (that is my 'I hate all things math" response to a heptagon). I didn't, just off the top of my head, remember this term from those horrific days spent in geometry class. I have to mentally say 5 - penta - like the building; 6 - hexagon (both have an x); octagon (easy - I played piano).

Luckily I don't have to generate all these synapses for a simple triangle (probably because I grew up in the Catholic school system - we like things in threes!); angle (ok - I know THAT one is 2 because it is similar to angels and THEY have two wings - DUH!!!(don't ask me about degrees). I automatically know squares have four sides (I'm SURE you don't want to know the mental permutations I have to conjure up to distinguish rhombus from a quadrilateral. And being a female - I just NATURALLY know that a diamond is ALSO a member of the 4 sided geometry family. Gee, I wonder if it would have been easier just to learn the actual content then making myself make up mnemonics, reminders, and rhymes?

On with the card recipe:
After chopping the postcard to fit the card front (why didn't I just say that?) I smudged up the edges with lime ink. I covered the actual postage stamp with a cupcake leaving the cancellation mark showing. I added glitter (Stickles) to the candle flames, re-purposed the birthday greeting from an old Hallmark birthday card. (OMG I can hear the wheels turning now....I'm going to have all my transfer peeps saving and sending me all the ready-made-cards they receive.) I covered the address block with a fresh one.

Now, I only hope I remember when my dentist appointment is....

You can get up close with the card by clicking on the image.

All good wishes,
Nancy

Bling Cheats


In the world of quilter's there is a term know as "cheater quilts". Cheater quilts are for people like me who love applique' but don't have the talent or patience to create an applique' quilt. I'm not afraid to admit it - I've made a cheater or two.

And now I have entered the realm of cheater card.... this card doesn't have any stamped image - it features a 3D sticker - complete with glittery highlights! Talk about easy!!!

To make up for being a 'card cheat' I also put together a card for a new (to me) challenge site. The current BasicGrey Challenge is to use BasicGrey design paper anywhere in the card along with some bling. Well...since I just came back from a vacation that included deep philosophical discussions about being or becoming 'Bling-Worthy', I decided I had to jump into this challenge!

Card Recipes

Cheated Birthday
~Base card - PaperTrey Ink
~Design paper Cosmopolitin Collection by Making ~Memories (this is one of those - 'why did I buy this' purchases. I used both sides - solid and floral.
~Sticker - from the $Tree
~Ribbon from Archiver's
~The sentiment is from Stampin Up

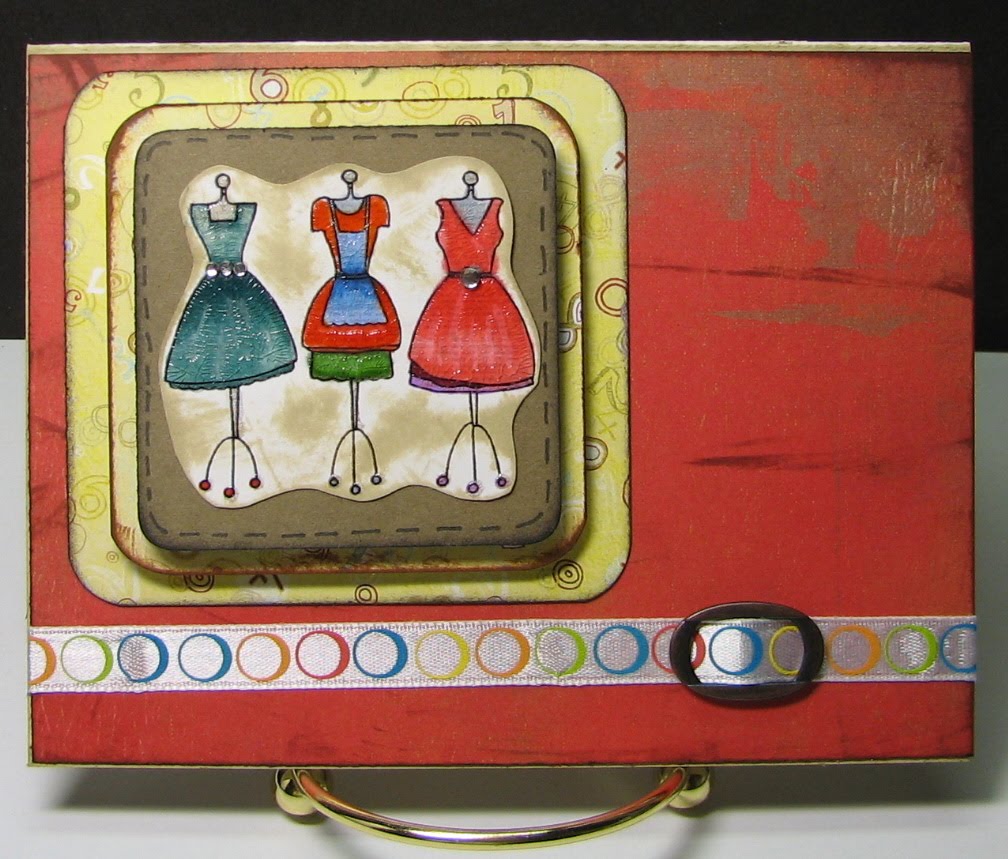
Dress Form Bling
~Base card - PaperTrey Ink
~Layer of BasicGrey Cupcake paper pad
~ Adhesive ribbon from JoAnne's (a gift from Sissy Gail) threaded through a Stampin Up Hodgepodge buckle
~Two more layers of BasicGrey Cupcake paper pad - with the edges curved
~Layer of olive cardstock edges smudged (I can't seem to NOT smudge edges - I just love the addition of depth it seems to create.)
~The digital image is a freebie from Mel Stampz. I colored it in using Copics and then coated it with Ranger Crackle Accents. The bling, at the waist of both outer dresses, I added last. (Okay - so it's not a Blast of Bling - it's an understated Bitty Bling.)
You can get up close with the card by clicking on the image.

All good wishes,
Nancy

Thursday, November 19, 2009

Ring of Fruit

Oh, I am so excited! Mel from Mel Stampz is one of my blog 'followers'! I've never met Mel but I love her blog! Her site is filled with tips and instructions. She isn't just a card maker she is into many crafty things. It is a great place for inspiration. Wow. I feel like a real card making blogger now!!

It is getting late so no stories tonight just a card. The image is clipart I 'discovered' this fabulous site reading Mel's blog! Clipart

Quite by accident this card turned out to be 'the perfect storm' of elements. I bought the ribbon more than a year ago from the dollar bin at Michaels. All this time it has sat loved but unused - cellophane wrap still intact. The upper right corner 'thingie' is half of the remains of a ring Sister Gail 'transferred' to me. I pounded it flat and put it in my "I might use this for something" box. The image I colored in while on my 'sisters vacation' not knowing when or how I would use it. The design paper...well I had it on hand but it also was unused but loved. I cut out the image, smudged up the white background, curved the edges - and BOOM - all the other elements popped into my noodle!


Fruitopia
~Base card is PTI
~Layer of BasicGrey Ambrosia
~Print ribbon from the dollar bin at Michaels
~Image colored in with Copics - coated with Ranger Crackle 'distressed with Old Paper and Teddy Bear Brown inks and layered on brown cardstock
~The embellishment in the upper right is half of the ring that held the china painted ring that Sister Gail 'transferred' (See China Ring card - November 17) (Watch for the other half to be used on a future card - just don't ask me what it will be or when it will happen.) (I'll have to wait for another 'perfect storm'.)

You can get up close with card by clicking on the image.

All good wishes,
Nancy

Weddings, Snowdrifts, and Slinkies

I got a text in the middle of the night last night. One of 'my' college students got engaged. I feel so blessed, I was the second person she told - right after her mama. Miss K is a senior with a 4.o GPA and has made it a daily practice during her time at BCU to come into my office and give me a hug. Sometimes she needs the hug, sometimes I need the hug, and sometimes it's just because it is our tradition.

Now I need to be conjuring up ideas for a wedding card! Miss K is one of a kind - so the card will have to be ...well...unique and VERY nontraditional wedding-esk. (Think heavy metal, natural blonde {however, she has gone with fuchsia, magenta, teal, red, and greens}, natural curls, tattoos (in moderation), amazing drawing talents, semi-goth, pirate loving, renaissance participant, woman-child who sits in my office and plays with my giggle stick, slinky, and bubble blower.) If anyone has any spot-on ideas for this wedding card....I'm open to suggestions.

By the way...I have a large basket of small toys (stress balls, tiny action figures, a yo yo, finger cuffs, kaleidoscope, and other small trinkets) in my office. Not for me...for 'my kids'. I initially had them there so students coming in to discuss terrifying subjects like re'sumes, graduate school applications, and internships would have something to help them relax....Now they just come in and play with the toys. They all have their favorites - and I usually know which one they will grab for...and YES, I wipe them down with Clorox wipes daily.


Snow Drifts Remembered

This is a response to a challenge over at Crazy 4 Challenges. At first I was going to pass on this week's suggest to use acetate. But reminding myself of the definition of the word challenge - I decided to go for it.

There are many interesting methods for using acetate in card making. Most of them - rather intricate and time consuming. Me? I opted for a lazy use of this clear material. I agreed to accept the smack down I never agreed to bust a hump about it!

Being lazy actually created just the look I was going for- how cool is THAT??? A shakeable card that would remind you of a snow fall with mounds of drifts. As you move the card from side to side the iridescent loose glitter slides around behind the acetate creating mounds of sparkly 'snow'.

Card Recipe~Base card - PTI
~Layer of daisyd's design paper (Showoffs) - it features a vintage chic look of snowpeeps
~Layer of acetate sewn with my Pfaff sewing machine - three sides then insertion of loose glitter - then the fourth side sew closed
~Snowflake brad secures the silver metallic thread and metal snowflake - which in it's former life was a Hallmark earring
~Oval card stock smudged with Tim Holtz Distress Ink and stamped with Just Rite's "Believe"

TaDa!! I survived an uncomfortable challenge!

You can get up close with the card by clicking on the image.
All good wishes,
Nancy

Wednesday, November 18, 2009

Right Back Atcha Judy!

My sister Judy, because she lives far, far away doesn't get the opportunity to participate in my 'local family' tradition of "transferring o' the crap'. You know, that stuff that you have sitting around that you no longer use, maybe never even wanted, so you knowingly foist it on someone else? This is NOT to be confused with re-gifting. No! No! No! Transfer of Crap is just flat out - "here I don't want this crap anymore - you take it"! Well, since I was just in GA visiting my southern sista, she had the chance to play ToC. I have to be honest, however, what she transfered really wasn't the typical 'crap'. It was a really cute gift enclosure card that someone had given her (no - she didn't give me the gift - only the card...).

So, now she gets the transfer item back in the form of a card!

Flowers by Judy
~Base card - PTI - edges smudged with pink
~Layer of pink cardstock - edges torn and pink ink smudged - embossed using a stamp from the $Tree and gold embossing powder
~Rectangular layer of DCWV matstock
~RE-PURPOSED gift enclosure card - trimmed down in size, edges pink ink smudged, and attached using foam dimensionals

You can get up close with the card by clicking on the image.

All good wishes,
Nancy

Tuesday, November 17, 2009

Gettin' My Mojo Back


It’s hard to decide what to yada yada on about. I am happy to report that little has changed in the village of Shellman Bluff, GA. It still has no two way streets, no Starbucks, no Wal-Mart, not even a mayor. And yes, I still have to walk outside the cabin to get cell phone service. It does have a volunteer fire squad although come to think of it I’ve not seen any emergency response vehicles. Imagine living in a siren free zone…
I will be sharing my delightful experiences about my recent 3/5’s vacation. But it will have to wait. Today I’m just posting some cards. I’ve had a few extra days at home so it’s been bubble time for me! Whooot!!!


Gettin' my Mojo Back!

I needed something to get me back in the grove of card creation following my return from the south. So I looked to my usual challenge blogs. This sketch challenge is from Mojo Monday and I used it several times. All three cards were made using the same sketch (layout). I actually took ALL my cards down south to friends and family - so I REALLY need to build up my stash! This is the sketch I used for these three cards.


Card Recipes:

Share the Joy
~Basic card PaperTrey - edges smudged with Ranger Distress Ink - Old Paper
~Layer of BasicGrey Wassil
~Sheer olive ribbon
~Another layer from the Wassil collection pack
~Sheer burgundy ribbon
~Layer of brown cardstock
~Layer of vanilla cardstock stamped with Stampin Up tree, glittered the stars, green mica glitter, Marvy liquid applique, star button tree topper with gold metallic tread
~Share the Joy was a tag that had blue on it - which I didn't want for this card. I cut the tag off center, turned it over, smudged it with Ranger Distress Ink and used both "halves"

China Transfer
~Base card PaperTrey Ink (PTI) - edges smudged with Stazon Teal Blue
~Layer of DCWV matstock
~Grossgrain ribbon
~Another layer of DCWV
~Layer of vellum - smudged up with Stazon Teal Blue
~Polka dot lime green satin ribbon
~Three layers of DCWV cardstock design cardstock
~Ovals of more cardstock - penned stitches
~The floral oval was 'transfered' from sister Gail - it was on a ring - I removed the china from the ring - and there it is! My mother handpainted the daisies on the china.
Niece Linda - Aunt Gail says YOU get this card. Since she 'transferred' the ring to me - I guess she gets to determine who gets the card.


Just for You
~Base card - PTI
~Layer of DCWV design cardstock
~Wide sheer olive ribbon
~Layer of vellum - plain
~Layer of vellum stamped using Stazon Teal Blue on Swirls by Rhonna Farrer
~Narrow strip of cardstock with aqua brad
~Vertical rectangle of DCWV cardstock
~Flower colored in using Copics, dotted with Marvy Liquid Applique and coated with Stampin Up Crystal Effects - the flower is digital from Mel Stampz
~Scallop die cut circle - olive, then topped with metal tag - sheer curly ribbon through both

You can get up close with the cards by clicking on the image.

All good wishes,
Nancy

Sunday, November 1, 2009

Fractions and Acronyms

Family week...
We had a great time last night visiting with Gary and Tamarah (nephew and niece) from Atlanta. Lots of laughs and reacquainting. Even a trip to the bar where Sister Judy (Gary’s mama) went on dates with future (and current husband). Off course had to take a few photos of the outside of the place. I don’t think the sign has been painted since it was originally installed years ago. Gary wanted to write something on the wall about for a good time call….his mama…. Thankfully none of us had a writing instrument! Tamarah DID put the picture up on Facebook. Seriously Judy – I had NOTHING to do with that!

Friday Sista Gail and I and ‘adopted’ Nila leave for our annual trek to the south….to see… MORE family. I’m not sure how to explain the 3/5’s club now that Nila is included. The original 3/5’s club is three of five siblings getting together every year to quilt and chill. (One from Omaha, one from Atlanta, and me – from Sioux City). Maybe an acronym would have been better than math…because what to do with Nila????

If we include her as a sibling – that would equal 6. (This is VERY dangerous territory – me working with math – please feel free to check my figures.) If she makes 6 than the number of participants equal 4. If I’m not mistaken 4/6’s has to be reduced (is that what you call it?). That would mean the club would be the 2/3’s club. That makes NO sense to me at all!

But she’s not really a sibling. So… 3/5’s + 1?

Hey! Why does she get to be a whole number and we are mere fractions. I HATE fractions! What if we mix fractions and decimals? 3/5.5? (Don’t think that is mathematically kosher)

How about some algebra thrown in just for fun? 3/5 + n = y {where y = fun}

Let’s try some acronyms using the first two letters of our names! Juga Nina. Sounds like a harsh tropical wind, wizened old crone from a fairy tale, or a cool name for a new alcoholic beverage! I LIKE it! Or we could go with Nigajuna. Sounds like a new solar system. Hmmmmm….. More thought required for this conundrum. Perhaps while I’m sittin’, chillin’, and annoyin’ I can come up with something BRILLIANT! I’m open to suggestions!

I will keep you informed on the trek to southern Georgia. (Think laughin' 'til you hurt, fabulous food, jammy-days, dock-sittin', and sister-bonding.) Sadly, I won’t be making any cards while I am on vacation. I will be Copic coloring in some images I stamped. I have not quite figured out how to be portable with card making materials. The sisters will be making quilts, I will be coloring, blogging, making sure there are plenty of fans going (I’m from the tundra – I don’t like HOT), generally trying to be a pain in their sides, and trying to keep up on work (via DIAL UP – OMG… I forgot about THAT little inconvenience…talk about ROUGHIN’ it!)

I’ll explain the whole annual adventure later this week…stay tuned!

The card is for Jennifer – she requested a baby girl card. Amy suggested the card have pigs…I passed on the suggestion.

Baby Jen

~Base card – PTI (Paper Trey Ink) Soft Blush edges smudged
~Layer of DCWV Nana’s Kids
~Baby bundle 3-D sticker – Special Moments from the $Tree attached to bright pink cardstock with edges smudged; Light pink ribbon from the $Tree, small light green safety pin and sheer hot pink ribbon
~Oh Baby 3-D sticker attached to a flower punch of green – DCWV Glitter Cardstock Stack

You can get up close with the card by clicking on the image.


All good wishes,
Nancy

Saturday, October 31, 2009

Bubble Infusion

Another week – poof- GONE! And only ONE card to show for it!

One late night was dedicated to tutoring. OMG – being a floor parent gets me into so much extracurricular activity! I started last year tutoring a (now) junior transfer student from Texas. “We” are “studying” the endocrine system… ISH!!! YUCK!!!! ICK!!! If anyone had told me I would someday be crackin’ open a Med-Surg textbook again I would have certainly told them where they could just tie their large intestine!

My fondest memory of my Medical-Surgical year during ‘nurse school’ – was the day MVBFWW (My Very Best Friend in the Whole World) Sharon-Loo and I literally kicked our Med-Surg books down two blocks from the hospital to my house. We laughed hysterically the entire way! This was way before it was hip to recycle…

One night was eaten up by the Graduate School Fair that my office (me) hosted. Just ask the students – I don’t play fair. I blocked off the path to the cafeteria re-routing everyone intent on eating dinner to pass in front of the grad school recruiters. Reluctant though they were, they knew better than to try to bypass my blockade. If I said it once – I said it a hundred times, “Just walk by and say ‘hi’ to the nice grad school people.” Some students actually did that. I would hear “Hi, nice grad school people!” Some felt the need to say Nancy is making us walk by you – can she really do that? (Well – I DID – does that answer your question?) To several I would say, “I ask you to do ONE thing for me all year long – You can do this for me!” (Wow, I sound more like a mother than a professional career director!) They all, surprisingly, played along with the detour. I know for certain that a few of the students stopped by for information that had the mandatory alternative route NOT been created would NOT have stopped at all.

Miss C came over two or three evenings to study. (At least I’m not requested to assist!) She just sits quietly in the basement – curled up with a quilt – and a ….physics textbook.

The floor parents all bought Little Debbie’s. (Did I ever tell you the Hostess Cupcake story?) Each of our ‘little darlins’ on Alverno Four – had a little Halloween surprise in their mailbox on Friday.

Other evenings I just worked late trying to ‘catch up’. Suffice it to say – not nearly enough Bubble time this week!

Now here I sit in Omaha at Sister Gail’s waiting for nephew Gary and neice-in-law Tamarah to arrive from Atlanta. Can someone explain why I drove to Omaha to see them when they will be in Sioux City tomorrow???? Just so I can party with them at a local pub. Burgers and Bloody Marys – whooooo hoooo! I’ve been giving Tamarah (good ol’ southern gal) a hard time about our impending snow – I actually hope it DUMPS on us while she is here.

Here is the card-data:
~Base card – Paper Trey Ink – Sweet Blush – edges smudged with olive
Layer of BasicGrey ‘Infuse’
~Vertical rectangle: layer of Bazzill Pickle green, layer of PTI Dark Chocolate, topped with BasicGrey Infuse – which was too bright white – so I over-stamped it with Distress Ink Old Paper using Stampin Up! Canvas background
~The Jacobean floral rectangle includes a layer of pickle, dark chocolate, striped BasicGrey Infuse, and topped with another final layer of BasicGrey Infuse – I outlined some of the stems with Versapen and used Adirondack Moss embossing powder
~Three neutral buttons with twine – attached with dimensionals

You can get up close with the card by clicking on the image.

Sunday, October 25, 2009

Boring or Peaceful


Student coming over this afternoon to escape the din of the dorms - so I'm just wondering - how boring ARE we? She needs a mausoleum-type quiet and I can provide it. WOW! Guess that tells you about MY social life. Miss C is the RA on 'my adopted dorm floor' and is pre-med. LOTS of tests coming up - so she will be reading and highlighting textbooks and I'm forcing myself to read and comment on student re'sumes. (I think I'd rather study for her histology exam.)

Here is what I took time to make this morning - procrastinating the re'sume reviews as long as I can - so told myself to make two cards instead of one...

Autumnal Geometry
This is a combo of two card challenges Crazy 4 Challenges and Kraftin' Kimmie. I admit I was reluctant to participate in anything with the word or derivative of the word CRAFT. I keep telling myself, I don't do crafts, I don't do crafts, ..... But I have to admit the challenge was fun and I marked it on my card challenge calendar. (Yes, I have a card making calendar...go ahead...shake your head, laugh out loud, snort even!)

The C4C challenge was to use at least three geometric shapes. The Kraftin' Kimmie challenge was to use autumn colors. Mix them together - whatada' get? Autumnal Geometry!
~Base card - Paper Trey Ink Ripe Avocado cardstock
~Layer of DCWV Indian Summer matstock - over-stamped with Stampin' Up Geometric (clever use of this stamp - eh???)
~Horizontal rectangle: layer of dark brown cardstock, layer of Indian Summer (smudged with brown Distress Ink)
~Vertical rectangle: layer of green, layer of Indian Summer - edges darkened with brown ink
~Squares: deckle punched (rescued manila folder) (Transfer of CRAP from sister Gail) - stamped with oak and maple leaves and colored in using Copic markers. The deckle edges were smudged with Versacolor Sand Beige and the leaves were topped with Crackle Accents. The deckle punches were layered onto dark brown cardstock and attached using foam dimensionals.
~Circle punch - rust, brown, olive and topped with pumpkin stamp - colored with Copics and coated using Stampin' Up Crystal Effects
Now THIS is geometry I can get into! (No memorizing, no measuring, no math!)

Archived Mojo
The sketch for this one is from Mojo Monday. (MOJO 109)
~Base card - Paper Trey Ink Ocean Tides cardstock (not only my FAVORITE brand of cardstock - ALSO my FAVORITE color!)
~Edges of the base card smudge with Versmark
~Layer of BasicGrey Archive collection (used 2 designs)
~Strip of stitched ribbon
~Rectangle layer of Ocean Tides - edges smudged with SU! Really Rust, layer of BasicGrey Archive mottled solid - stamped with Peaceful Wishes from SU! using Versamark then embossed using Tim Holtz Distress Powder black soot.
~Circle (punched) of Ocean Tides and topped with ToC button cover (from ...you guessed it....Sister Gail!) I popped the button hardware from the gold medallion...there you have it!

You can get up close with the card by clicking on the image.

All good wishes,
Nancy

Thursday, October 22, 2009

Who knew my basement would become so popular?

Is that the dryer I hear? Why yes it is. The RA on ‘my’ floor on campus asked if she could come over to the house tonight. She needed a quiet place to study. I told her sure she could! And she might as well bring a load of laundry with her. She put in her laundry sat and contentedly read for two hours. It is very quiet at our house compared to a floor with 57 young, energetic, music loving, giggling, talkative girls (young women).
She dashed out the door with fresh laundry in hand just in time to get back to campus before the histology lab closed. She is a pre-med major. I wouldn’t want her schedule or course load! While she was silently pouring over who knows what science book I got to sit in my bubble and make a card.

Quiet Moments

~Base card Paper Trey Ink
~Making Memories Cosmopolitan Collection (edges smudged with Tim Holtz Vintage Distress Ink) Okay - honesty time - this is a pack of paper that I can't even believe I bought. I must have been in some kind of a Hobby Lobby trance. Maybe it was the religious music they play... What was I thinking???? Was I thinking??? I was probably having a Hershey with Almonds sugar - low. I don't even have card making friends (or enemies) that I could say, "here - would you like to have this"? I can't even use this in the dreaded ToC (Transfer of Crap). Well, that being said, I am labeling this under the "You bought it - now USE it category. (Did you know I label these cards in this blog? I did that because I was CERTAIN that SOMEONE would want to check for entire lists of card categories!) Sure they will Nancy...and Mount Rushmore is in Sioux City. (I'll explain later.)~Both sets of rectangles are from the same Making Memories collection – using fronts and backs of the design paper
~Three pink brads on left side of horizontal rectangles
~Vertical top layer rectangle stamped using Stampin’ Up! Canvas background, edges roughed up and smudged
~Three progressively smaller Nestibilities scallop circles and one circle punch stamped with SU! Delight in Life colored in with Copics and brad for flower center
You can get up closed with the card by clicking on the image.That's all for Bubble Talk tonight...
All good wishes,
Nancy

P.S. I was at a one-day conference this week in Des Moines (which IS in Iowa). (Okay that is a lie – I was actually in Ankeny, Iowa – but NOBODY knows where THAT is.) The conference attendees were all from private colleges/universities in Iowa. One of the ACADEMIC DEANS (yes I meant to use caps to infer SHOUTING) said to me, “Oh, Sioux City! That’s were those four famous guys are carved in stone!”
REALLY??? Are you KIDDING ME??? The DEAN of an IOWA University????
Living my entire life in Sioux City (SUX for any of you flying into our one runway -no jetway airport), I know for a certainty that Mount Rushmore is NOT located here. I guess I thought that the 4 stony faced dudes were famous enough that MOST intellectual people would know, at a minimum, that they reside somewhere in the state of South Dakota. (Not sure how far reaching the jingle advertisement airs but it IS catchy - 'great places, great faces – South Dakota!’ Evidently it isn’t aired in his ‘neck of the woods’. Maybe they don’t have TV or radio in Fairfield, Iowa.)
After I, politely, enlightened him with accurate information regarding the location and statehood of George, Teddy, Abe, and Tom I was tempted to say, “no, we don’t have those peeps but we got us a body part or two of some fool who traveled with Lewis and Clark (the Floyd Monument) and we got us ‘big God’ as my granddaughter refers to the 3 ton, 33 feet tall sculpture of Jesus, by sculptor Dale Lamphere.” You family members who read this – don’t worry – I didn’t really say that to him. (I can feel their collective sigh of relief through my cable modem….)
He then asked if Rapid City was close to Sioux City…. God I hope he doesn’t teach geography and I hope he does have a GPS in his car. I won’t share with you all the snarky virtual comments I was feverishly holding back…

P.P.S. I stand corrected. Ankeny does have a claim to fame: "KaBOOM! named Ankeny a 2009 Playful City USA community for a third consecutive year." I found this major bit of trivia on the City of Ankeny website. SWEET Martha!I love the internet!

Monday, October 19, 2009

It'll Quilt Out

Sometimes when making a quilt - there comes a point when you are not sure whether or not to proceed. Is the project 'finish worthy' is it 'quilt worthy'? Then - when quilting - is it Bonnie worthy (the extreme machine quilter) or is it just Trudy worthy (utilitarian quilter). If your inner fiscally responsible - I spent hours cutting - I bought it so damn it I'm going to finish it wins this turmoil - You continue working on the project with a mantra to keep you going. Over and over as you remain bent over the sewing machine - you hear, in your head, 'it will quilt out...it will quilt out...IT WILL QUILT OUT.'
This card was one of those - should I proceed or deep-six it? I told myself - "it'll quilt out" and finished the little bugger.

Maple Leaves Wreath

~Base card SU!
~Layer of hunter green cardstock and topped with a layer of design paper by Bo Bunny
~The wreath was made by making a scallop circle using Spellbinders and Cuttlebug and lots of maple leaves were punched - the square base of hunter green edges were rounded using a punch
~A coordinating Bo-Bunny strip was added vertically along the side
~A brad from the Dollar Tree was used to attach the orange ribbon to the wreath
You can get up close with the card by clicking on the image.

Time to get to bed - have to get on the road to Ankeny by 6:30 am.

All good wishes,
Nancy

Sunday, October 18, 2009

It's Not All Black and White

Wow! I can make quite a few cards when I get up early, don't cook and don't clean! Here is another one.

Combination of two challenges: Crazy 4 Challenges (C4C7) and Splitcoast Stampers Saturday Inspiration. It was a good combo because one was a sketch (layout) challenge the other was to find inspiration from a tile making online catalog.

I know... I know ...the tiles I picked to inspire me are ONLY black and white... but if you've read enough of my blogs - you also know I don't follow directions very well! Besides - the challenge was to INSPIRE not dictate...right?

It's Not All Black and White
~Base card Paper Trey Ink white cardstock (amazing weight and texture)
~Three layers of solid color cardstock: red, purple, black (Sister Gail goes to Archiver's for the buy 5 get five cardstock coupon - so lucky me - I get the cardstock - all she gets is her name in my blog...) I love that she is a sucker for a coupon! (Don't tell her I told you that.)
~The black and white swirly thingie...hmmm... don't know where I salvaged that from. I think it came with a box of Crayons. The black is slightly raised. I think it was for laying a sheet of paper over and rubbing the crayon over for a cool effect?
~Next is a layer of white Paper Trey Ink cardstock scallop cut using Cuttlebug and Spellbinders Circle Scallop (It is really, really great that these are compatible!)
~A second layer of scallop circle - using black cardstock
~Image is from the Stampin' Up! Peaceful Wishes set using Versamark and Ranger Seafoam White embossing powder on a black circle punch (Marvey brand)
~Ribbon (yes, I know the sketch calls for three dots, brads, or buttons, etc - so sue me!) I'm directionally impaired - as in 'do this, then that, then this' AND navigationaly speaking as in north, south, east, west. It's a curse! Luckily I don't really NEED either for card making.
You can get up close with the card by clicking on the image.

P.S. In case you were wondering ALL the laundry got washed, dried, folded, and toted back to campus!

All good wishes,
Nancy

Sleep-over Quilt

The girls had a laundry sleep-over. They fell asleep on the sofa. The good news is they did get ALL their laundry done. To be fair they were doing laundry for four not just two. Evidently the other two, dirty clothes wearing students, escaped a boring night at my house shouldering laundry detail. The football team won yesterday's game so R & N were at the celebratory party. How is that for true friendship?

When I realized T & S were still here, asleep, because of laundry - I remembered I had this wee, little, 9-patch quilt card. The quilt was on a thank you note that Nila sent me. I hope she doesn't mind that I picked it apart! With the sound of the washer and dryer as background white noise I couldn't help myself. These little clothes pins were screaming to be used in honor of the lower-level-laundry-ladies.

Razzleberry Quilt
~Base card is PaperTrey Ink (PTI) white cardstock
~Layer of PTI Razzleberry Fizz
~Top and bottom rectangles of PTI Razzleberry Fizz Mix, center rectangle is a coordinating design paper from the Razzleberry Fizz Mix
~I attached the quilt to ANOTHER coordinate of the Fizz Mix - layered that on solid Razzleberry Fizz then a layer of black cardstock
~Square brad - Fun Expressions from Oriental Trading
Thanks for the thank you card Nila!
You can get up close with the card by clicking on the image.
All good wishes,
Nancy

Saturday, October 17, 2009

LOADS of Laundry


Oh to be young again… We have two college students, downstairs, right now doing laundry. They JUST arrived… 9 PM. They will be still doing laundry when I get up in the morning. They have mountains of dirty laundry!
Every once in awhile I ask a couple of my office ‘regulars’ if they would like to do laundry at my house. (Did I mention I'm a floor 'mom'?) Ask them? They'll tell you - Laundry on campus…YUCK. Sharing washers with BOYS!! Going in to put your washed clothes in the dryer only to find out that someone has taken your wash out of the washer and placed it on the floor… Well, needless to say, they LOVE coming the house, hangin’ out, watching movies, doing laundry.

Well, T & S are now starting hours and hours of laundry. They have movies in hand, textbooks to read and study. I just told them to lock the door when they leave.

On to the cards…I’m trying to get bunches made so I can take them with me on the annual sister’s trip. We leave SOON… Why did I waste part of the day CLEANING – I have serious quantities of cards to make!

Medallion
~Base card vanilla cardstock – edges smudged with cranberry and rose
~Design paper K&Co – Amy Butler (stripe)
~Next is another layer of Amy Butler using a quilt maker technique – fussy cutting – around the medallion. I attached the ‘medallion’ to a layer of navy cardstock.
~The image was stamped, on the back of the striped Amy Butler design paper, using one of the stamps from the Verve ‘Life’ set. I used Versamark then Ranger Cobalt Blue embossing powder. I attached this to a layer of navy, salmon, green, and another layer of navy cardstocks and added lime green brads.

London Butler
~Base card is Paper Trey Ink cardstock – edges smudged with SU Really Rust ink
~Design paper is K&Company Amy Butler
~The next layer is vellum stamped with Stazon Teal Blue using Stampabilities Le London Script. I tore all four sides of the vellum after I stamped it.
~The narrow strip at the top is one of the coordinating DP in the Amy Butler collection
~The larger flower is die-cut and smudged with assorted inks
~The top flower and rhinestone is from Petaloo


Pink Hydrangea

This is a loose interpretation of challenge over at Crazy 4 Challenges (challenge C4C7)
~Base card is Paper Trey Ink cardstock – edges smudged
~Next is a layer of design paper – Moda for DaisyD ‘frost green’ (MODA – can you believe it – one of my favorite quilting fabrics – available in paper – THAT is so AWESOME).
~I smudged up the top of the die-cut and dry embossed oval layer with several colors of ink and added brads to three corners
~The image is a digital freebie colored in with Copics. I dotted Stampin’ Up Crystal Effects on the centers of each of the petals and attached the stem – slightly behind the oval.

Well, I’m going to bed…the girls are on their own doing laundry and watching movies!

You can get up close with the card by clicking on the image.
All good wishes,
Nancy